Simple Drift Customization
Body kits, wraps, underglow, tint, strobes, air ride, and garage workflow for clean first-person looks.
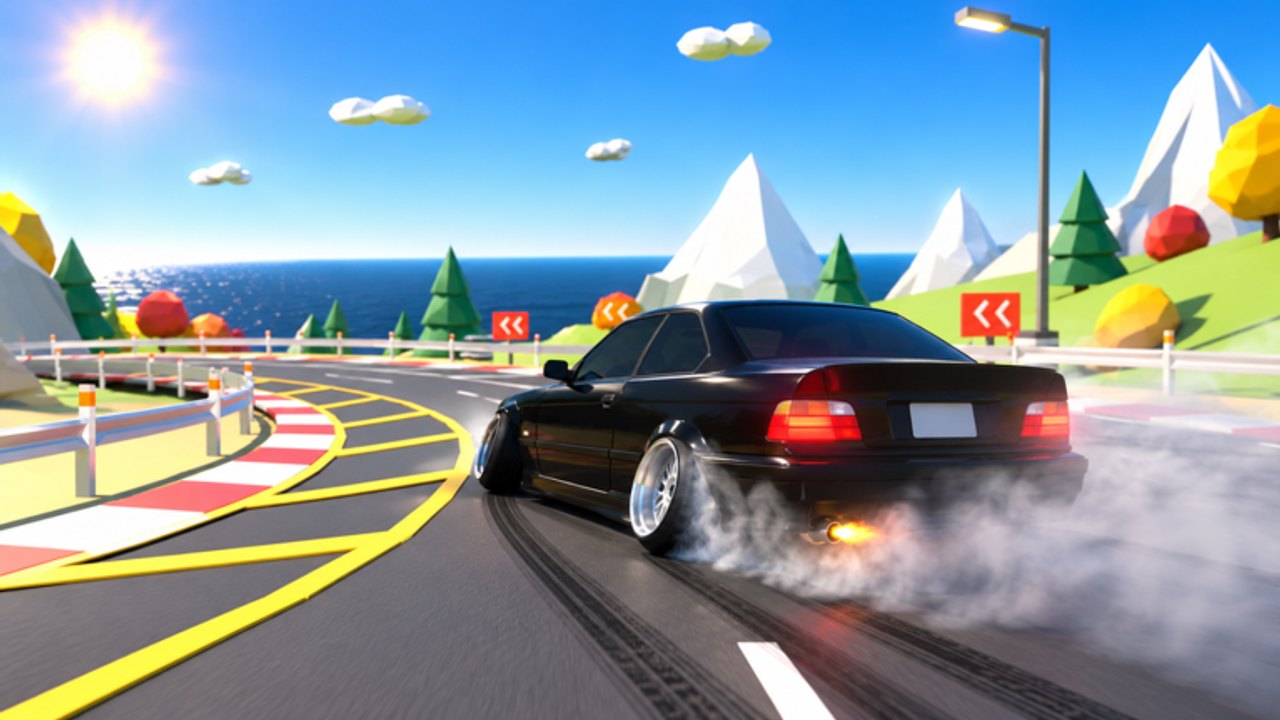
Simple Drift by Third Floor sells the fantasy of a personal drift garage: 45+ cars, 60+ body kits, wraps, underglow, window tint, drift strobes, and air ride, all readable in first-person while you cruise nine maps. This guide is the cosmetics deep dive. Handling still lives in Car Tuning; cash flow lives in Earn Cash. Here we focus on how to dress the car without wrecking your progression.
Official play link: Simple Drift on Roblox.
Spend priority: handling before cosmetics
Pretty cars that cannot catch a slide become expensive crash montages. Use this order every time you unlock a new chassis:
- Confirm the car fits your current skill band on the Cars Tier List.
- Apply a light tune — steering angle, stance, then power / turbo / gearing — from Car Tuning.
- Prove the setup on a map you already know from Maps.
- Only then open kits, wraps, underglow, tint, and strobes.
Codes and group perks fund both layers. Redeem live promos on Codes, keep the Third Floor +15% cash active, and finish dailies before you empty the wallet on a full aero package. If you still struggle with Space and Q, park the garage and revisit Controls.
Body kits (60+)
The kit catalog is the largest visual lever in the game. Kits change bumper lines, aero presence, and silhouette so the same chassis can read as street sleeper, show build, or touge weapon.
How to shop kits well:
- Match the kit mood to the car story. Aggressive canards suit high-angle JDM icons; cleaner lines often look stronger on hypercars.
- Preview in motion, not only parked. A kit that looks sharp in the garage can clip sight lines in first-person.
- Prefer one coherent aero story over stacking every expensive piece because it is available.
- Re-check after patches — kit drops and balance notes land on Updates.
Kits do not raise top speed or judged scores. They raise presence. Buy them when the car already rotates how you like.
Wraps and livery identity
Wraps are how your garage reads across a crowded lobby. A consistent livery helps friends spot you in tandem and makes screenshots feel intentional instead of random inventory flex.
Practical wrap habits:
- Pick a primary color language and stick to it across your main cars so your crew recognizes you instantly.
- High-contrast wraps photograph better on bright docks and circuit maps; darker liveries shine on night routes.
- Avoid changing wraps every five minutes. Decide a look, drive it for a session, then iterate.
Wraps pair naturally with tint and underglow. Treat them as one palette decision, not three unrelated purchases.
Underglow
Underglow is the night-map specialty. On night touge and night city, a controlled glow sells the clip; on bright daytime docks it can look noisy if overdone.
Guidelines:
- Soft, single-hue underglow usually ages better than rainbow spam.
- Match glow color to wrap accents so the car feels designed, not decorated.
- Test brightness in first-person. Overly loud glow can wash reflections and distract during technical corners.
Underglow is cosmetic. It will not fix late initiation. It will make a clean line look cinematic when the map lighting cooperates.
Window tint
Tint is quiet polish. It darkens the cabin, sharpens the exterior silhouette, and helps first-person presentation feel more immersive when you cycle camera modes with C.
Use tint when:
- You want a calmer cabin view for long practice sessions
- Your wrap is bright and needs contrast at the glass line
- You are building a night-city or parking-lot style car
Keep visibility in mind on technical maps. Style should never hide apexes you still need to see.
Drift strobes
Drift strobes add motion flash for clips and lobby presence. They reward clean angle because a stable slide keeps the strobe rhythm readable; a panicked spin just looks chaotic.
Best practice:
- Enable strobes when you plan to record or showboat on night maps
- Keep them off while learning a new chassis so visual noise does not mask throttle mistakes
- Pair strobes with underglow sparingly — one hero effect often beats two competing flashes
Strobes are a presentation tool, not a handling upgrade.
Air ride and stance presentation
Air ride feeds the slam-and-show fantasy: drop for garage photos, raise when you want a more planted mental model for real runs. Stance and air ride sit on the border between cosmetics and feel — big height changes can alter how confident the car feels even when the underlying tune is unchanged.
Workflow:
- Set functional stance while you tune handling.
- Slam for screenshots and lobby flex.
- Return to your driving height before judged runs or tandem sessions.
- After any big height change, re-test the same three corners so braking points stay honest.
Aggressive fitment looks especially right on JDM-leaning builds like the A31 Cefiro. On a Chiron-class hypercar, extreme slam can look dramatic in photos and nervous at speed — prioritize control height until your throttle discipline matches the power.
Chassis notes: A31 Cefiro vs Chiron style
A31 Cefiro and JDM icons
These cars reward classic drift presentation: deep kits, smoked tint, restrained underglow, and wraps that feel period-correct or modern tribute. Shorter gearing and higher steering angle from your tune make the visual aggression match the driving style on touge and night touge.
Chiron and hypercar flex
Hypercars already shout with stock presence. Cleaner kits, sharper wraps, and selective glow often look richer than covering every panel in aero. Cosmetics come last here because raw power punishes sloppy inputs — see the hypercar control notes in Car Tuning before you spend the full visual budget.
Either way, pick the chassis with Cars Tier List intent first: beginner farm, style touge, or hypercar destination.
Garage workflow (repeatable loop)
Use the same garage loop so you stop impulse-buying:
- Spawn the car you will actually drive for the next twenty minutes.
- Confirm tune basics still match the map.
- Choose kit silhouette.
- Lock wrap + tint as one palette.
- Add underglow and strobes only if the map is night-forward.
- Set air ride height for the activity (drive vs photo).
- Exit to a real map and validate in first-person.
If cash is tight, stop after step 4. A coherent wrap and tint beat a half-finished glow stack.
Fund the loop with dailies, judged runs, and group bonus routes from Earn Cash. Do not burn the free 3000GT progression path just to cosmetically dress a car you cannot slide yet — claim group rewards during Getting Started and grow the garage deliberately.
First-person presentation
Simple Drift’s first-person driving is a major reason cosmetics matter. Cycle camera with C until you find a view that shows hood line, kit edges, and enough road for initiation timing.
Presentation tips:
- Check whether a tall wing or deep bumper eats your sight picture before you commit cash
- Use first-person on night city to judge underglow bloom against street lights
- Switch back to a wider camera when learning a new map so cosmetics do not distract from braking points
Comfortable camera habits are documented alongside the full key map in Controls.
Screenshot tips: C camera and U HUD hide
Clips and stills sell your build to friends and to yourself after a long grind.
- Park or roll into a clean composition on night touge, night city, or a wide docks straight.
- Press C to cycle into the camera angle that flatters the kit line.
- Press U to hide the HUD for a clean frame.
- Hold a slight drift angle if you want strobes and underglow to read in motion.
- Restore HUD with U before the next judged attempt so you do not miss UI prompts.
Night maps reward this workflow most: light spill, wet-looking asphalt vibes, and glow layers do the heavy lifting. Day maps still work when your wrap contrast is strong.
Night map cosmetics (night touge and night city)
| Map mood | Cosmetic bias |
|---|---|
| Night touge | Kits + tint + restrained underglow; strobes for clip runs |
| Night city | Underglow and wrap contrast; strobes optional for traffic flex |
| Day docks / circuit | Wrap and kit silhouette first; go easy on glow |
| Forest / technical day | Visibility over flash — tint with caution |
Full map roles and when to drive each environment sit in Maps. Cosmetics should follow the map you queue, not the other way around.
Social and crew context
Matching liveries make tandem ghosts and lobby meetups easier to organize. If you run with a regular group, agree on a simple color rule so everyone can spot the pack. Etiquette and community notes live on Players. Keep flex friendly — blocking lines to show underglow helps nobody’s judged score.
Related pages
Tune the slide first, then dress the car for the map and the clip you actually want.
Frequently Asked Questions
Quick answers to the most common questions.
Do body kits or wraps make my car faster in Simple Drift?
No. Kits, wraps, underglow, tint, and strobes are visual. Speed and drift control come from power, turbo, gearing, steering angle, and stance in Car Tuning.
What should I buy first — cosmetics or handling upgrades?
Handling first. Lock a usable tune and prove it on a familiar map, then spend on kits and wraps. Cosmetics will not teach Space and Q timing.
Which cosmetics look best on night touge and night city?
Restrained underglow, darker or high-contrast wraps, window tint, and optional drift strobes. Preview in first-person so glow does not wash out your sight lines.
How do I take clean screenshots of my build?
Cycle camera with C, hide the HUD with U, pick a flattering map angle (night city or night touge work well), then restore the HUD before your next run.
Should Cefiro and Chiron builds use the same cosmetic style?
Usually not. Cefiro and JDM icons suit aggressive kits and classic drift presentation; Chiron-class cars often look stronger with cleaner kits and selective glow after the power is under control.